Any Linux server distribution is a very powerful server that performs above and beyond what your business might need. Whatever task you throw at the server, it will be ready. And, if it isn’t ready out of the box, you can make it so.
If you aren’t sure about SFTP, it is the FTP service built into Secure Shell (SSH), which allows users to securely push and pull files to and from the server, using SSH.
I’m going to walk you through the process of setting up an SFTP server. I’ll demonstrate by creating a single user that is limited to only SFTP logins. Once you know how to do this, you can create as many users as you need. This process will work on any Linux distribution.
Let’s make it work.
SEE: Troubleshooting Linux: An Admin’s Guide (TechRepublic Premium)
What you’ll need
You’ll need access to an account with admin rights. Once you’ve procured that access, it’s time to make this work.
SFTP Directory
The first thing we must do is create a directory that will house our FTP data. Open up a terminal window, su to the root user (type su and then, when prompted, type the root user password), and then issue the following two commands:
mkdir -p /datachmod 701 /data
SEE: How to Add an SSH Fingerprint to Your known_hosts File in Linux (TechRepublic)
Create the SFTP group and user
Now we’re going to create a special group for SFTP users. This is done with the following command:
groupadd sftp_users
Now we’re going to create a special user that doesn’t have regular login privileges, but does belong to our newly created sftp_users group. What you call that user is up to you. The command for this is:
useradd -g sftp_users -d /upload -s /sbin/nologin USERNAME
Where USERNAME is the name of the user.
Next, give the new user a password. This password will be the password the new users use to log in with the sftp command. To set up the password, issue the command:
passwd USERNAME
Where USERNAME is the name of the user created above.
SEE: How to Start, Stop, and Restart Services in Linux (TechRepublic)
Create the new user SFTP directory
Now we’re going to create an upload directory, specific to the new user, and then give the directory the proper permissions. This is handled with the following commands:
mkdir -p /data/USERNAME/uploadchown -R root:sftp_users /data/USERNAMEchown -R USERNAME:sftp_users /data/USERNAME/upload
Where USERNAME is the name of the new user you created above.
Configure sshd
Open up the SSH daemon configuration file with the command:
nano /etc/ssh/sshd_config
At the bottom of that file, add the following:
Match Group sftp_usersChrootDirectory /data/%uForceCommand internal-sftp
Save and close that file. Restart SSH with the command:
systemctl restart sshd
SEE: 5 Best Linux CentOS Replacement Options & Alternatives (TechRepublic)
Logging in
You’re all set to log in. From another machine on your network that has SSH installed, open up a terminal window and issue the command:
sftp USERNAME@SERVER_IP
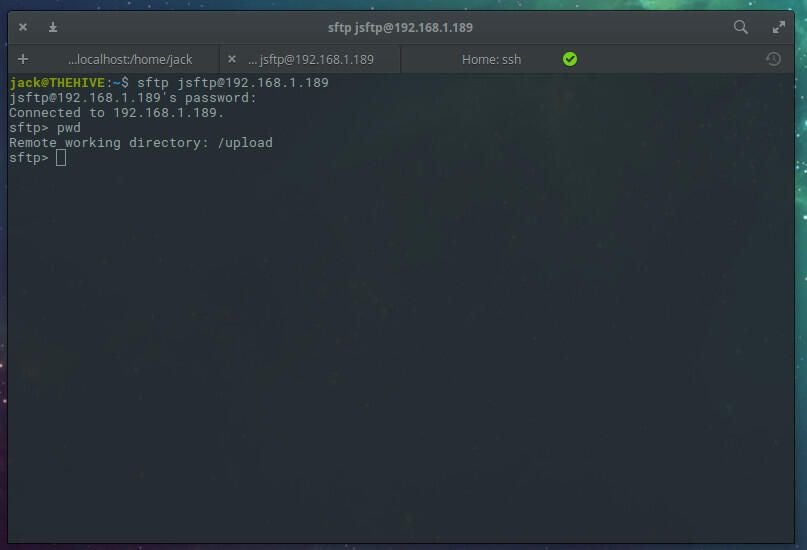
Where USERNAME is the name of our new user and SERVER_IP is the IP address of our SFTP server. You will be prompted for USERNAME’s password. Once you successfully authenticate, you will be greeted with the sftp prompt. Type pwd to check the working path and you should see /upload as depicted in the image below.

A simple solution
That’s all there is to setting up an SFTP server on Linux. For any company looking to offer staff and clients a simple, secure means of uploading and downloading files, this is a not only a great solution but also very budget friendly one. Get your SFTP server up and running with zero cost and zero headache.
This article was originally published in September 2019. It was updated by Antony Peyton in January 2025.

